
Unreal Composure
Lesson Plan
Setup Composure in Unreal to merge a live camera feed with a with a CG scene, and send the combined footage out over SDI.
Camera
Connecting
Turn your camera on, and connect it to the Decklink. We will use a Decklink 8K Pro, but other supported cards should work the same.

Note
To our knowledge, the Microconverter - Blackmagic HDMI to SDI 3G is the only supported HDMI to SDI converter that preserves timecode.
Settings
Your camera must output a known color space. We will use sRGB in our example by having the BMPCC transform the outgoing HDMI signal via a LUT.
BMPCC sRGB over HDMI
See Generate a LUT Color Space Transforms on setting up the BMPCC to output sRGB.
While the HDMI signal is 1080p sRGB, ensure your camera is set to record in its RAW format with its widest-gamut color space.
Blackmagic Raw Setup
See BMPCC to Blackmagic Raw on setting up the BMPCC to record in 4K RAW.
Media Source Setup
We use a Media Bundle to connect Unreal to the Decklink.
Create a new Media Bundle

Double click the bundle to configure it.
Add a Blackmagic Media Source.

Choose the settings which exactly match your camera feed. For ours, we are shooting at 24fps. Despite recording at 4k the HDMI output is only 1080p.

Drag the media bundle into your scene. It doesn’t matter where. We are just testing that it works. You should see your camera feed appear on the plane you just dragged in.
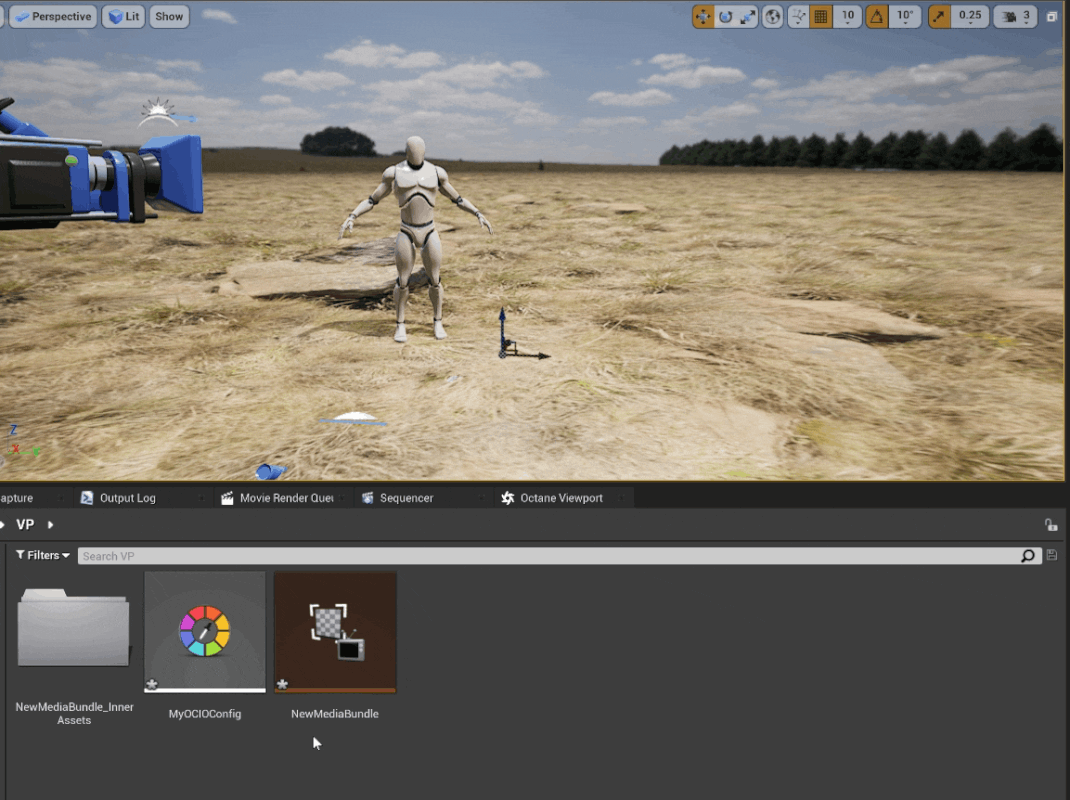
If the media isn’t playing, try clicking Request Play Media in the details panel.

Important
If your footage doesn’t appear see Verifying the Decklink SDI Connection for help.
Timecode and Genlock
Our composure output will output timecode, and use genlock to drive the render frame rate. Without timecode, the footage you record from composure will not match up with any VFX you render in post-processing. We want the live composited footage to exactly match the timecode of the raw footage.
Timecode & Genlock
See Unreal Timecode and Genlock on setting up timecode and genlock with the Blackmagic Decklink 8K Pro.
Check that the timecode in Unreal is being driven by your custom blueprint, and the displayed time matches your camera. Check that genlock is operating at the desired framerate.

Virtual Camera
Set your virtual camera to exactly match your real-life camera.
Virtual Camera Matching
See Unreal Virtual Camera Matching for details on configuring the virtual camera.
Composure
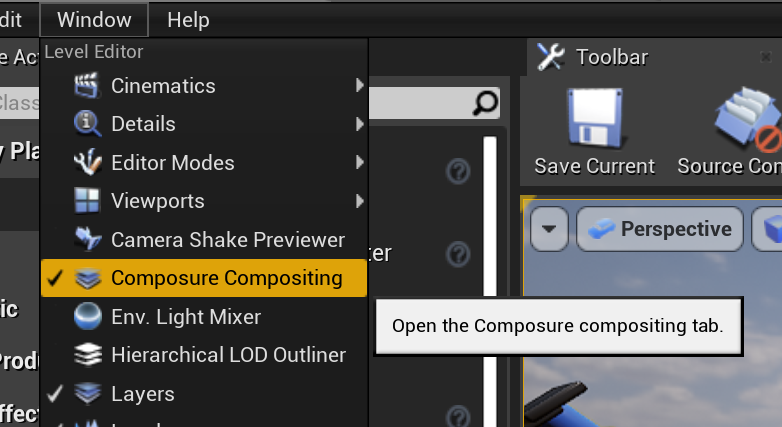
Ensure the composure tab is visible
From the composure tab, right-click to create a new comp and choose Empty Comp Shot. Name it anything you like.

The composure actor serves as a container for our other components which will be added together to make the final output.
Media Plate
The Media Plate is how we add our camera input to the composure.
Right-click the comp and Add Layer Element. Choose Media Plate.

In the media plate details panel, under
Inputs > MediaSource > Media Sourcefind the texture created with your media bundle. You should be see a copy of the live video in the texture thumbnail.
OCIO Input Transform

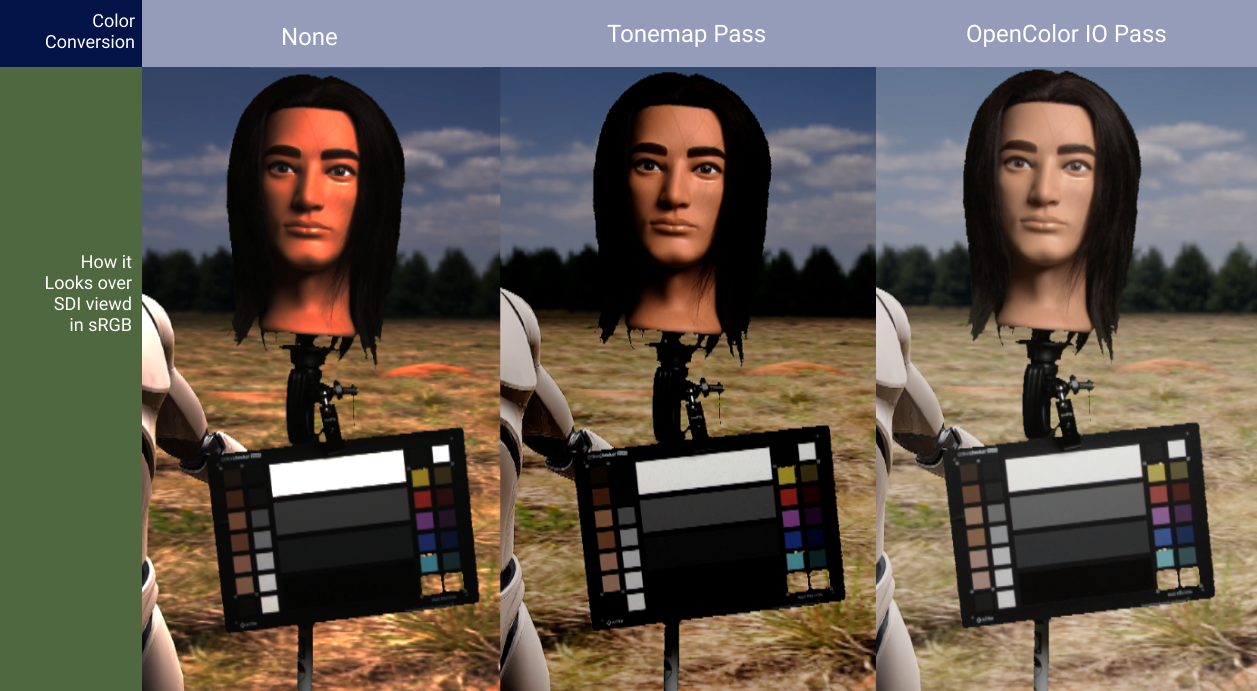
A broken color pipeline can be hard to notice. sRGB without an OCIO transform looks almost right, but it’s not nearly as vibrant when compared to correctly transformed footage.
Before keying, we need to convert the sRGB footage into sRGB-linear. Add a new transform pass, and move it to the beginning before Multi Pass Chroma Keyer.
Choose Compositing Open Color IOPass, and select your OCIO config.
Under Source Color Space, choose the color space your HDMI feed is using, in our case it is sRGB.
Under Destination Color Space, choose
Utility - Linear - sRGBthe Unreal Engine color space.

Note
It is handy to have a color chart to see if your colors look right. If not, you may have a break in your color pipeline. Fix it now.
Chroma Keying
The next step is keying out the green screen. In the BURN Workflow, the composure output we are creating is a sort of “proxy”. We capture the live composure, which allows our editor to get started immediately, but the proxy will be replaced by a higher quality render later.
We will key out our 4K footage again in DaVinci Resolve, so the keyed footage in this section only needs to be good enough.
Use the Multi Pass Chroma Keyer transform to remove your green screen.

Despill helps remove any green color which has reflected back onto your subject.

Erode trims the fringes of your subject, letting you create a crisper edge.

CG Plate
In the composure tab, right-click the comp and add another layer element. Choose CG Layer. You should see two layers to your comp, a media plate, and a cg element.

The CG layer adds a camera to your scene. Point your camera at whatever you want. We are going to overlay the media plate and CG layer. This will insert the live actors into the CG scene seen by the camera.
LiveLink
If you want to add motion see Unreal Vive LiveLinkPlanned.
Composing Layers
Select your comp, and in the details panel under Transform Passes add a transform pass.
Leave the default type as
Compositing Element Material Pass.Create a new material, and save it anywhere.

The material we just created is in charge of combining the layers of the comp. Open the material editor to edit the material. We want it to look like this eventually:

Add two TextureSampleParameter2D nodes.
Name the first exactly the same name as your media plate.
Name the second exactly the same name as your cg element.
Warning
If the node names do not exactly match your layer comp names, it won’t work.
Combine the RGBA channels with an Over node. Ensure the media plate is on top, since it contains an alpha layer (from the keyer).
After combining, we have to mask out the alpha layer, or the Blackmagic Media Output will complain. Attach the Over node’s output to a new Component Mask node. In the details panel, ensure only R, G, and B are selected.

While selecting the output material, under the details panel change Material Domain to Post Process.

Attach the mask output to the emissive color.
Click on the comp to see a preview of the combined layers.

Adding a Garbage Matte
See Unreal Composure Garbage MattingHelp Wanted on adding a Garbage Matte.
Media Output
The composure is running! Now we need to send it somewhere to record. We will send the video feed out through an unused Decklink port, and record the signal outside of Unreal. Any device which can record 1080p over SDI can be used, including the Decklink itself.
Loopback Recording
See Decklink Loopback RecordingPlanned on setting up Decklink to record the Unreal output in another program.
Select the comp in World Outliner, and go to the details panel. Add a Compositing Media Capture Output Output Pass to the Composure Outputs.
If the Capture Output setting is blank, create a new Blackmagic Media Output and save it anywhere you like.

Choose an unused port to output the SDI signal.

Make sure to set VITC as your timecode format, and Wait for Sync if you have genlock enabled. Wait for sync will only render frames when your Custom Time Step triggers, which should help keep everything moving in lockstep.

OCIO Output Transform
We want precise control over the colors going in and out of unreal, and our color pipeline utility is OCIO. We will use OCIO to explicitly convert the color space of the SDI signal to sRGB. Remember that our live composure footage is a rapid proxy, and as such we don’t want to waste time color grading the imported footage at edit.
Under the default settings, Unreal applies tone mapping to our image, and sends it out. We don’t want this. We want to use OCIO.
With the comp selected, go to the details panel. Next to Color Conversion click Compositing Tone Pass and change it to Compositing OpenColor IO Pass.
Select the OCIO Config you have already been using.
The source color space is Unreal, which is always Linear - sRGB.
The destination color space is whatever you want, but we are going to use sRGB.

If you view the SDI signal on an sRGB calibrated monitor, it should look correct. Here we have looped our signal back into the Decklink to view the composure output in Blackmagic MediaExpress.

We loop back our SDI connection into Blackmagic Media Express to view the output.
You can use Blackmagic MediaExpress to record the composure output, as it will capture the output with timecode intact.
Final
Enhance Your Lighting
Check out Unreal Composure LightingPlanned to get your composure looking its best.
If you followed every step, great work. You have setup composure with end-to-end timecode-integrity and an intact color pipeline.